How to check your suspension ball joints.
You are on an evening drive with the guys, back from a fun, eventful day. Everyone sharing laughs and singing along to the tune blaring over your Honda Accord’s sound system. Just as you hit the brakes for the red light, the steering wheel take a sudden turn for the left. As quick as this happens you manage to take control of the wheel. The vehicle moves a few yards forward before coming to a complete halt. There is sudden silence in the car, except the sound of “Fem” by Davido playing on your stereo.
As you come down to check what could have happened, you remember your last experience with the traffic officials and first go to the boot to put your C-Caution sign. You walk back to the front of the car, check the left wheel and everything seems fine. Going to the right wheel and you have a buckled wheel. The arm of the car seems torn of its normal position and is folded awkwardly inwards. At that point it dawns on you that you would be needing a tow-truck to get you out of there.

After paying for the tow truck to first get you to the safety of your mechanic’s garage, you have to wait till the next workday, Monday, to get full diagnosis of what happened to your car. For this night, the mood is a somber one as you order your cab to take you and the guys home. Come Monday, the auto mechanic gives you a call to tell you it’s the bad/worn ball joint that caused the accident.
How could you have prevented this accident from happening? How can you check for worn ball joints? What signs should you look out for to point to a worn or bad ball joint? These and more would be discussed in this blog post.
What signs should you look out for.
There are a number of signs that let you know that your ball joints may be starting to wear out. It’s possible that the symptoms of worn ball joints develop slowly, so you don’t notice for a while. But, if you notice any of the symptoms below it is a sign that you may want to start considering a check and possible replacement to your ball joint.
- Clunky or squeaky noises
- Drifting to the side
- Loose or shaky steering
- Uneven tyre wear
These signs are part of the things to look out for when driving. If you would just like to double check your ball joints, it’s best to first check your ball joints when driving before doing a visual inspection.
How to check your ball joints when driving.
To further confirm the nature of your ball joint, take your car out for a drive. Checking your ball joints when driving is straightforward, simply drive the vehicle on a smooth, well paved public road at the speed limit and pay close attention to the engine, steering and overall performance of the car. What you are looking out for are:
i. Vibrations:
When a ball joint wears out, it becomes loose which can create a vibration that you can feel through the floor or the steering wheel while you drive.
ii. Steering wheel wandering to the left or the right:
Worn ball joints cause the steering to pull from left to right on its own. This can also cause uneven wear on your tyres.
Secondly, drive over speed bumps. After driving at the speed limit, take it somewhere with speed bumps and drive it at a low speed. Stop and go a few times, and turn a few times. While driving over the bumps, you are looking out for noise – this can be a clunking or squeaking noise. Clunking noises are caused by the worn ball joints rattling as the suspension travels up and down over the road. The squeaking noise is caused by the rubber boot that protects the grease inside the ball joint is damaged, the ball joint will start to squeak. These noises will get louder the more worn the ball joints become.
The third and final to check the ball joint while driving is turning the steering wheel. Park the car and turn the wheels back and forth a few times, while listening for noise from the ball joints.
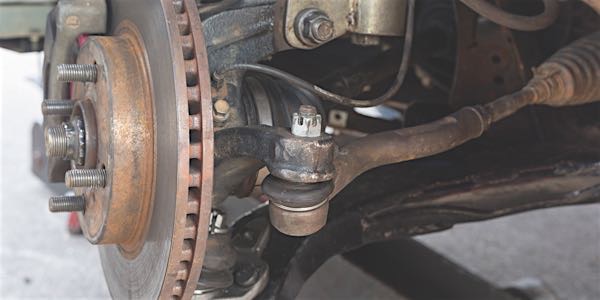
How to check ball joints visually
Now that you have checked your ball joints while driving, it’s time for a visual and physical inspection. Before you start, get the following tools ready:
- Jack
- Jack stands
- Flashlight
- Pry bar
- Lug nut wrench
- Wooden blocks or wheel chocks
To do a visual and physical inspection follow the steps below:
1. Check your tyre wear
Loose ball joints would certainly affect your drive/steering alignment. Poor alignment accelerates tyre wear by causing the rubber tread to touch the ground in an inconsistent way. If you notice uneven spots of wear on a tyre or that the front of the wheels points out, there’s a good chance that your ball joints will need further investigation. However, if the tyre wear is equal on both sides, then the issue is probably not your ball joints, but due to under-inflation of the tyres.
2. Loosen the lug nuts
Loosen the lug nuts so they are hand-tight. This will allow you to move the wheel around on its axis, without removing it completely.
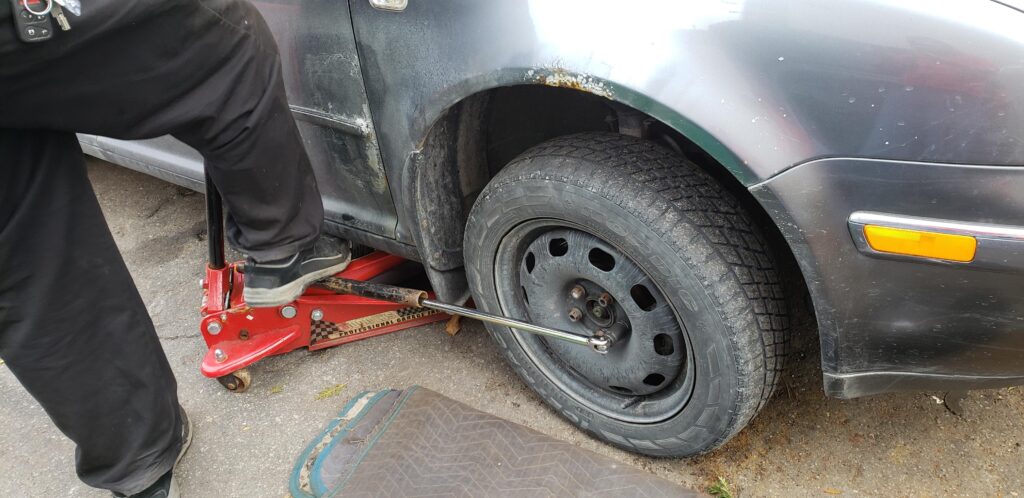
3. Jack up the car and place wheel chocks behind the wheels
Jack the front of the car up and secure it on jack stands. Put wheel chocks or wooden blocks behind the back wheels to prevent the car from rolling. This will make it easier to test the ball joints.
4. Rock the tyre on its axis
Grasp the top and bottom of the tyre and rock it in and out along the wheel’s vehicle axis. If the ball joints are working well, there should be little to no play in this movement. If you notice noise and play from the top, this indicates a problem with the upper ball joint. Noise and play from the bottom on the other hand suggests a problem with the lower ball joint.
5. Remove the wheel
Remove the wheel and use a flashlight to visually check the upper and lower ball joints. Can you see any signs of rust, damage to the dust boot, grease leakage or any other potential problem? If so, it’s probably time to replace your ball joint.
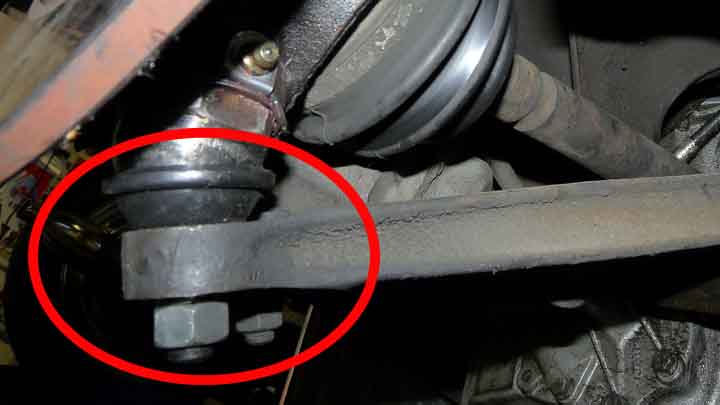
6. Pry the ball joint apart
Use the pry bar and attempt to pry the lower control arm and the steering knuckle (the two components connected by the ball joint). Look out for excessive amounts of play and movement or clicking sounds. These are signs that your ball joints are too loose.
7. Put the wheel back on
After you have finished visually inspecting and testing the ball joint, replace the wheel, lower the car and torque the lug nuts.
8. Repeat with the other wheels
After you have finished the first wheel, you need to check the other three, by following steps 2-7.
If it is noted that your ball joint require a change, it’s important to go for quality – after all, your ball joints have to support the weight of your entire car. This is especially important if you stay in a region with very poor roads.
Ultimately, we would advice you to seek professional advice from a certified technician or mechanic. We also encourage you to bring in your vehicle for periodic checks, which would include a thorough check of the suspension system, amongst other things. This would prevent many road accidents and breakdowns and now you can drive rest assured that your evening drives home would not be interrupted by buckled wheels or nay issue that may result from a worn ball joint